Product Photo Editing for E-commerce: 5 Practical Tips
When someone shops online, they can't pick the product up, turn it over or hold it against the light. The photos have to do all of that for them. That's why product photo editing matters so much for an online store. The aim isn't to make things look better than they are. It's to show them clearly, accurately and consistently.
Here are five editing habits that make the biggest difference, followed by how to keep a whole catalog consistent.
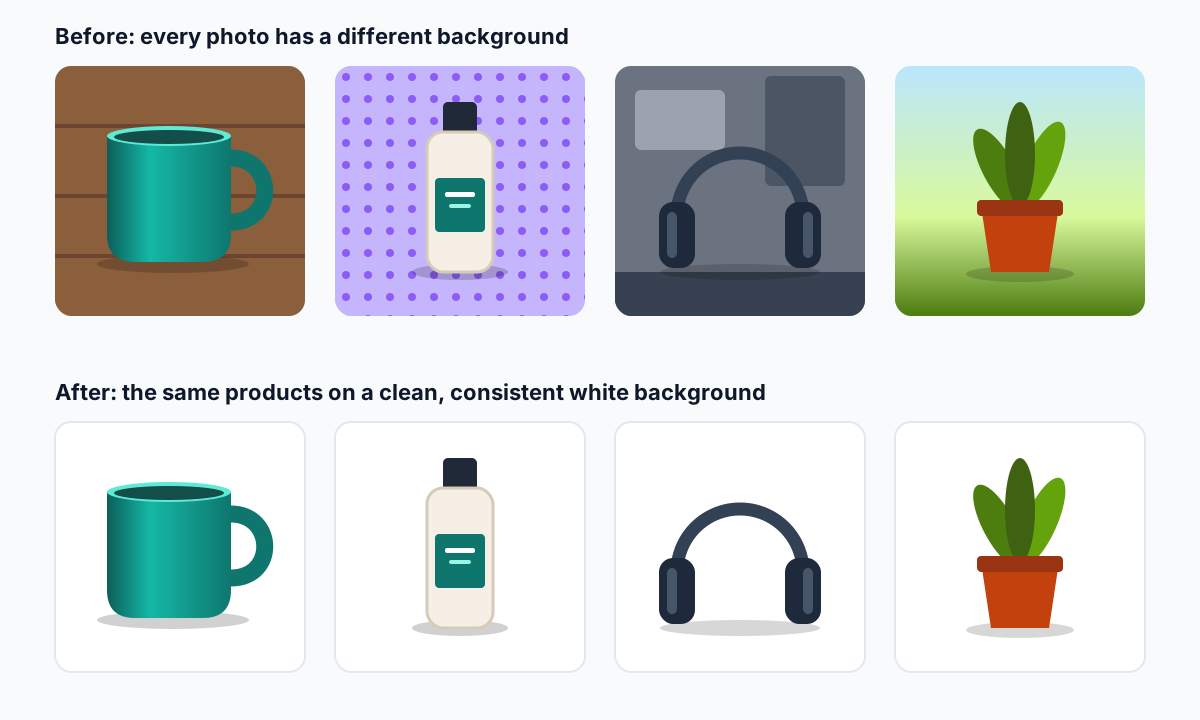
Why editing matters for product photos
Good product photos help shoppers understand what they're buying, and that helps build trust in your store. Photos that match the real product also set honest expectations, which means fewer disappointed customers and fewer returns caused by "it looked different in the picture". A consistent style across every listing makes a small shop look organised and professional.
Tip 1: Give products a clean, consistent background
A plain background puts all the attention on the product, and it makes a grid of listings look like a single, planned collection. White is the most common choice, and some marketplaces require it. Amazon, for example, asks for a pure white background on the main product image.
- Shoot on a plain backdrop that contrasts with the product, so it's easy to separate.
- Remove the background, then place the cut-out on pure white (#FFFFFF) or your chosen colour.
- Keep the product at a similar size and position in every image, with even margins around it.
- Check edges for a halo of the old background, especially around light-coloured products.
Not sure white is right for your brand? Our guide to choosing a background colour looks at white, grey, black and brand colours.
Tip 2: Keep colours accurate
If a customer orders a "sage green" jacket and receives something closer to olive, the photo let them down. Colour accuracy is less about making colours vivid and more about making them true.
- Set the white balance correctly when you shoot, or correct it afterwards using something you know is white or neutral grey in the frame.
- Shoot in RAW if your camera or phone supports it. It keeps more colour information to work with.
- Compare the edited photo with the real product side by side, in daylight.
- Avoid pushing saturation to make a product "pop". It usually makes colours less accurate.
- If you edit a lot of product photos, a calibrated monitor is worth considering.
Tip 3: Crop and size consistently
Consistent framing makes a category page easy to scan. Pick one aspect ratio for your main images (square is a common choice for stores and marketplaces) and stick to it.
- Upload images large enough for zoom. Around 1000 pixels or more on the longest side is a common recommendation, and some marketplaces ask for more. Check your platform's requirements.
- Let the product fill a similar share of the frame in every photo.
- Compress images for the web so product pages load quickly, then check that detail still holds up when zoomed. Our Image Compressor shows the before-and-after file size, and there's more on this in reducing image file size for websites.
- Export the sizes you need for thumbnails, product pages and social media from one master file.
Tip 4: Light evenly, then add depth carefully
Soft, even light shows texture and detail without harsh reflections. A large window, a couple of affordable softboxes, or a white card to bounce light into the shadows will get you most of the way there.
After you've removed the background, a product can look as if it's floating. A subtle, soft shadow underneath grounds it on the new background. Keep that shadow faint and consistent across your catalog.
Tip 5: Finish with the details
- Remove dust, lint, fingerprints and stray threads. These are small things, but they stand out when a shopper zooms in.
- Include a size reference where scale isn't obvious, like a hand holding a ring or a mug next to a laptop.
- Add lifestyle images showing the product in use, alongside the clean main image rather than instead of it.
- Don't retouch away real features. A slightly textured finish or visible seam is part of the product.
Keeping a whole catalog consistent
Consistency comes from making decisions once and reusing them. A short style guide, even a single page, saves a lot of guesswork:
- Background: colour and any shadow style.
- Framing: aspect ratio, margins and camera angles (for example front, back, side and detail).
- Lighting: a setup you can recreate, noted down or photographed.
- Editing: saved presets for white balance, exposure and export settings.
- File names: a predictable pattern such as
product-name-colour-angle.jpg.
Once these are in place, batch editing tools can apply the same adjustments to a whole folder of photos at once.
Useful tools
Free and low-cost
- ClearCut: online background removal.
- GIMP: free desktop image editor.
- Canva: easy layout and design tool.
- Pixlr: browser-based photo editor.
Professional
- Adobe Photoshop: detailed retouching and compositing.
- Adobe Lightroom: colour correction and batch editing.
- Skylum Luminar: photo editor with AI-assisted tools.
- Capture One: RAW processing and tethered shooting.
If you're just starting out, a free background remover and a basic editor cover most needs. Invest in more when you find yourself repeating the same fiddly task.
Common mistakes to avoid
- Over-editing: a product that looks better than the real thing leads to disappointment.
- Mixed styles: different backgrounds, angles and lighting across listings make a store look unplanned.
- Forgetting small screens: many shoppers first see your product as a small thumbnail on a phone. Check that it's still recognisable at that size.
- Heavy files: uncompressed images slow down product pages.
How to tell whether it's working
You won't see the effect of better photos in a single sale, but over time it's worth watching:
- conversion rate on product pages after you update their images;
- return reasons that mention appearance, colour or size;
- customer questions that a clearer photo could have answered;
- how quickly product pages load.
Start with the background, since it's the change that makes the most visible difference across a catalog. You can remove a product photo's background with ClearCut and work through the other tips from there.