Mobile Photo Editing: A Simple Workflow for Better Phone Photos
Phone cameras are good enough now that most photos people share never touch a computer. Editing on the phone is quick and free, and it means you can go from shot to post in a few minutes. The difference between a flat phone photo and a polished one usually isn't the app. It's doing a few things in a sensible order.
This guide walks through that order, from taking the photo to exporting it for the platform where it'll be seen.
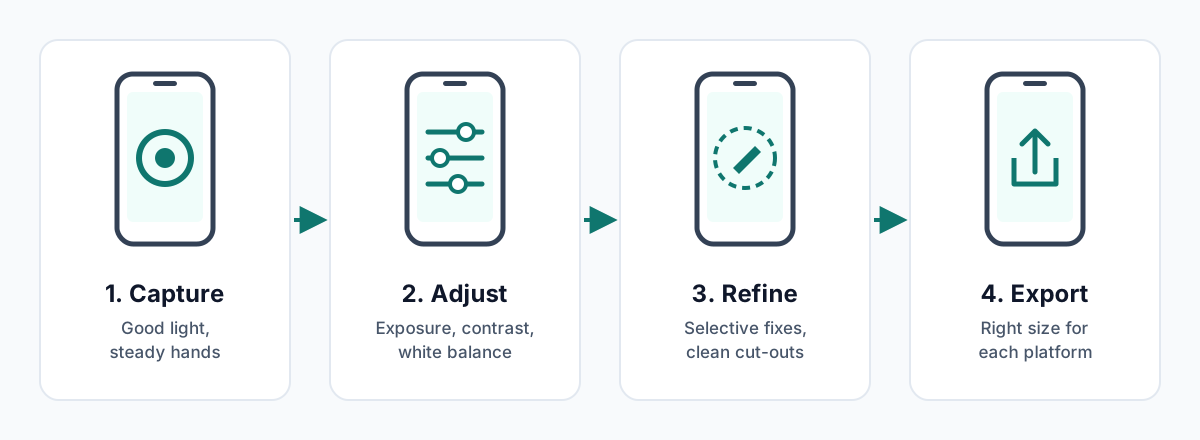
Why edit on your phone?
- It's convenient: you can edit wherever you are, right after taking the photo.
- It's quick: small corrections take seconds, which suits social media.
- It's cheap: several capable editing apps are free or low-cost.
- It keeps everything in one place: you capture, edit and share on the same device.
Step 1: Get the shot right first
Editing can improve a good photo, but it can't rescue a blurry or badly composed one. A few habits at the capture stage save a lot of editing later:
- Clean the lens. A fingerprint smudge is the most common cause of hazy, low-contrast phone photos.
- Find good light. Soft daylight from a window beats overhead indoor lighting almost every time.
- Tap to focus. On most phones you can then slide to adjust brightness before you take the shot.
- Avoid digital zoom. Move closer instead, or use your phone's dedicated telephoto lens if it has one.
- Keep it steady and take a few shots, so you have a choice.
- Use the grid. Turning on the camera grid helps with straight horizons and the rule of thirds.
- Try RAW if your phone offers it. RAW files hold more detail in bright and dark areas, although they take more storage.
Step 2: Make the basic adjustments
Work from big changes to small ones. The order matters, because each adjustment affects how the next one looks.
- Crop and straighten. Fix a tilted horizon and crop to the shape you need (more on that below).
- Exposure or brightness. Get the overall brightness right.
- Contrast. Add a little to give the image depth. Too much crushes detail in the shadows.
- Highlights and shadows. Bring back detail in a bright sky or a dark foreground.
- White balance. Use temperature and tint to remove unwanted colour casts, like the orange of indoor bulbs.
- Colour. Vibrance boosts muted colours while leaving already-strong ones alone, so it's usually a gentler choice than saturation.
Step 3: Refine selected areas
Once the whole image looks balanced, fix individual areas:
- brighten a face or darken a distracting bright spot with a selective or brush tool;
- remove small blemishes, dust or stray objects with a healing tool;
- correct converging lines in photos of buildings with perspective tools;
- cut out the subject if you want to place it on a new background.
For that last one, you can open ClearCut in your phone's browser, upload the photo and download a transparent PNG. The image is uploaded for processing, so there's no app to install.
Finish with sharpening and noise reduction, and go easy on both. Over-sharpening creates bright outlines, and heavy noise reduction makes skin and textures look waxy.
Step 4: Export for where it'll be posted
Each platform crops images to its own shapes, so it helps to edit with the final shape in mind:
- Instagram feed: a 4:5 portrait image fills more of the screen than a square one. Square (1:1) is still a safe choice.
- Stories, Reels and TikTok: 9:16 vertical. Keep important details away from the top and bottom, where buttons and captions overlap.
- Profile pictures: square, displayed as a circle. Keep the face centred.
- Facebook and LinkedIn link images: roughly 1.91:1 landscape.
Exact pixel sizes are listed in our social media image size reference. Also keep an eye on file size if you're posting to a website rather than a social network, because large files slow pages down. The Image Compressor works in your phone's browser too.
Apps worth knowing
Snapseed
Good for: detailed free editing. It has selective adjustments, a healing tool, perspective correction and RAW support.
Adobe Lightroom Mobile
Good for: precise colour and light adjustments, presets and syncing edits across devices. Free with paid features.
VSCO
Good for: film-style presets and a consistent look. Free with paid presets.
ClearCut
Good for: removing backgrounds in your phone's browser and downloading a transparent PNG. Free.
The best app is the one you're comfortable with. Most people find one general editor, plus a background remover for cut-outs, covers nearly everything.
Habits that save time
- Save your own presets once you find settings you like. They keep a feed consistent and cut editing time.
- Keep the original. Most apps edit non-destructively, but export a copy rather than overwriting the only version.
- Edit in decent light with screen brightness at a normal level. A dim screen makes you over-brighten photos.
- Use albums or folders for projects, and back them up to cloud storage.
- Batch similar photos: copy edits from one photo and paste them onto the rest of a set shot in the same light.
Common mistakes
- Over-editing: strong saturation, heavy clarity and dramatic filters are the quickest way to make a photo look processed.
- Stacking filters: one filter, adjusted to taste, is usually enough.
- Ignoring composition: no edit fixes a cluttered frame. Crop tighter or reshoot.
- Forgetting the final crop: an image edited as a landscape and then cropped to 9:16 can lose its subject.
Want to put your subject on a clean or colourful background? Pick a colour using our guide to choosing a background colour, then remove the original background.