How to Convert JPG, PNG and WebP Images
Sooner or later, an image arrives in the wrong format. A website builder rejects your WebP, a print shop wants JPG, or you need a PNG because the logo has to keep its transparent background. Converting between JPG, PNG and WebP is simple once you know what actually happens to the image along the way, and what doesn't.
This guide explains what image conversion means, when to use each format, and how to convert without losing more quality than you need to.
What image conversion actually means
An image file isn't just a picture. It's a picture stored using a particular set of rules, called a format. JPG, PNG and WebP each store pixels differently: some throw away detail to save space, some keep every pixel exactly, and some can store transparency.
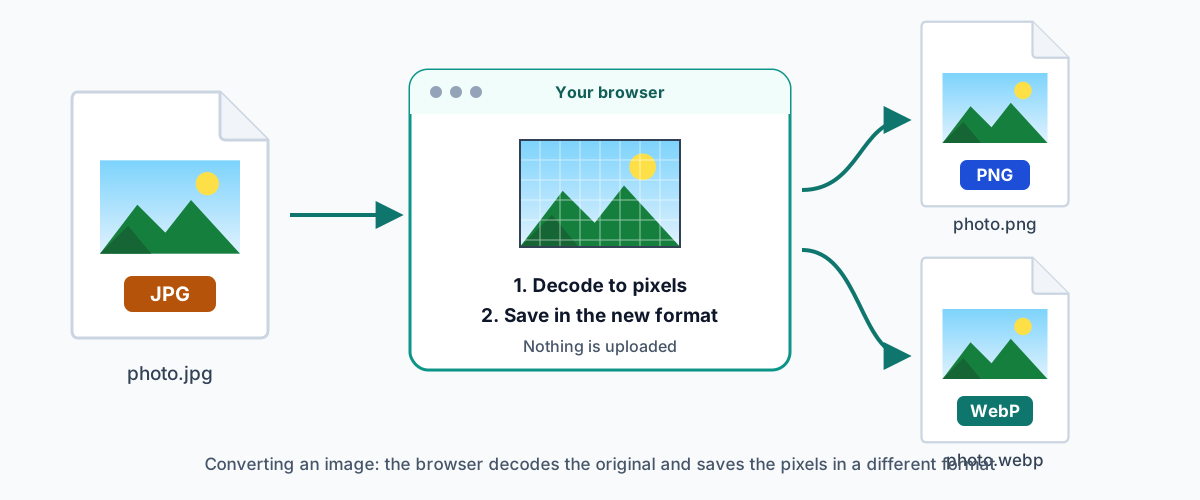
Converting an image means reading it in one format and writing it out in another. The software decodes the original into a grid of pixels, then encodes that grid using the new format's rules. Renaming photo.webp to photo.jpg doesn't convert anything. The file is still WebP inside, and some apps will refuse to open it.
JPG, PNG and WebP in brief
- JPG (or JPEG) uses lossy compression. It discards detail your eye is unlikely to notice, which makes photos small. It can't store transparency.
- PNG is lossless. Every pixel is stored exactly, and transparency is supported. That's ideal for logos, screenshots and cut-outs, but it makes photos large.
- WebP can be lossy or lossless and supports transparency. It often produces smaller files than JPG or PNG for similar quality, and all current major browsers can display it. Some older software and upload forms still don't accept it.
There's a fuller comparison in JPG vs PNG vs WebP: which image format should you use?
When to convert to each format
Convert to JPG when…
- a website, form or print service only accepts JPG;
- you have a photo saved as PNG and want a much smaller file;
- you need the most widely compatible format, such as for email attachments.
Convert to PNG when…
- the image has a transparent background you need to keep, and WebP isn't accepted;
- it's a logo, diagram or screenshot with sharp edges and text;
- you'll edit the image again and don't want another round of lossy compression.
Convert to WebP when…
- the image is going on your own website and you want a smaller file;
- you want transparency with a smaller file than PNG usually gives.
How browser-based conversion works
Modern browsers can already decode JPG, PNG and WebP images. They can also draw them onto an HTML canvas and save the canvas as a new image file. ClearCut's Image Converter uses exactly those built-in features. Your browser opens the file, draws it, and saves it in the format you choose. The image never leaves your device.
There are a couple of limits to be aware of. Browsers can only create the formats they support: Safari, for example, can display WebP but can't create it from a web page, so the converter disables that option there. Very large images can also run into memory limits, especially on phones.
How to convert an image with ClearCut
- Open the Image Converter and drag in a JPG, PNG or WebP file, or click Choose image.
- Pick the format you want: JPG, PNG or WebP.
- For JPG or WebP, set the quality. 90% keeps nearly all visible detail, and lower values make smaller files.
- If you're saving a transparent image as JPG, pick a fill colour for the transparent areas.
- Click Convert image, check the preview and the new file size, then download.
Quality considerations
Each time you save a lossy format like JPG or WebP, the encoder makes fresh decisions about what detail to discard. Saving once at a high quality is fine. Repeatedly opening, editing and re-saving the same JPG slowly degrades it, a bit like photocopying a photocopy.
Converting in the other direction doesn't undo that. A JPG converted to PNG looks exactly like the JPG, compression artefacts and all, because PNG faithfully stores what it's given. If you have the original, unedited file, always convert from that.
File size considerations
File size changes can be surprising at first:
- JPG to PNG usually makes a photo much larger, since every pixel is now stored exactly.
- PNG to JPG usually makes a photo much smaller, but it's a poor choice for text and flat graphics, which get fuzzy edges.
- JPG or PNG to WebP often reduces the size, although not for every image.
If file size is your main goal, the Image Compressor lets you compare sizes directly and also reduce the dimensions.
Transparency considerations
Transparency is where most conversion mistakes happen. PNG and WebP can store it; JPG can't. When a transparent image is saved as JPG, the transparent areas have to become a solid colour. If a tool doesn't let you choose, the fill can be black, and your cut-out ends up on an unexpected dark background. ClearCut's converter asks you to choose the colour instead, with white as the default.
If you've just removed a background with the Background Remover, keep the result as PNG, or convert it to WebP, to preserve the transparency.
Common mistakes to avoid
- Renaming instead of converting. Changing the file extension doesn't change the format inside.
- Converting a transparent logo to JPG and ending up with a white or black box around it.
- Expecting PNG to improve quality. It preserves what's there, but it can't restore lost detail.
- Converting photos to PNG for a website. The files get much larger and pages load more slowly.
- Converting the same file back and forth. Each lossy save loses a little more.
Practical examples
A marketplace won't accept your WebP
Product images downloaded from a supplier's website are often WebP. Convert them to JPG at around 90% quality. If a product has a transparent background, choose white as the fill colour, since many marketplaces expect white anyway.
A logo for a website header
Your designer sent a large transparent PNG. Converting it to WebP usually keeps the transparency with a smaller file. Keep the PNG as your master copy for print and future edits.
A screenshot saved as JPG looks fuzzy
JPG blurs sharp text. Converting it to PNG won't fix the blur that's already there. Instead, retake the screenshot and save it as PNG from the start.
Ready to try it? Open the Image Converter. It works in your browser, and there's nothing to install.